Easily install pre-built Shopify section templates without hiring a developer!
Shopify Insights
A Step-by-Step Tutorial on Using Shopify Metaobjects

Shopify Metaobjects are data containers that merchants can create to store and organize additional data structures beyond the standard fields provided by Shopify. They essentially expand the power of Metafields by allowing merchants to group multiple Metafields together in one container (“object”).
In this tutorial, we will walk you through the process of using Shopify Metaobjects effectively, enabling you to extend your store's functionality and customize your data storage.
Step 1: Understanding Shopify Metaobjects
Before diving into the implementation, it's important to understand what Shopify Metaobjects are and how they can benefit your online store. Metaobjects are custom objects that act as containers for storing additional information related to products, collections, customers, orders, and more. They are essentially a group of Metafields making it easier to consolidate and add relevant content to your pages. You can read more about it here.
At first glance, it can be difficult to see why you would use Metaobjects instead of Metafields. But there are two main advantages to using them over Metafields:
- Metaobjects group many data values making it easy to update any or all of them in one place.
- Metaobject entries can be shared across multiple entities and not be restricted to just one entity (i.e. Products).
Step 2: Planning Your Metaobjects
To effectively use Shopify Metaobjects, start by planning the structure and hierarchy of your custom data. Consider the entities you want to associate with Metaobjects and the specific information you want to store. For example, you may want to create a Metaobject called "Shop The Look" to store products that are mentioned in a blog post.
Step 3: Creating Your Metaobjects
- Login to your Shopify Admin dashboard.
- Navigate to "Content" and click on "Metaobjects".
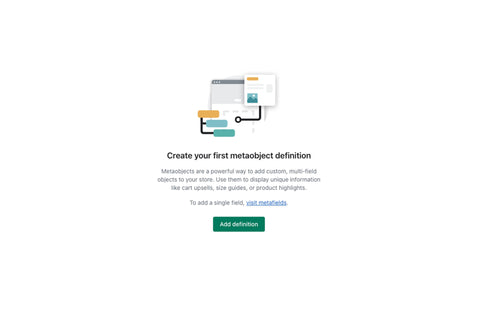
- To start creating a new Metaobject, click on "Manage definitions" over on the right side next to the “Add entry” button. Then click on “Add definition”.
- Give the Metaobject a Name. You’ll want to make this name descriptive so you can easily recognize its use.
- Add the data fields that will be stored in this Metaobject. If you’re familiar with creating Metafields, this part is very similar, since you’re essentially creating one.
- Provide the required information:
- Name: Give your Metafield a name. This should be descriptive. For example, if you want to add a title, then “Title” should be the name.
- Description: This is an internal description that you can add to remind you what this Metafield is for. It’s optional.
- Value Type: Choose the appropriate data type for your Metafield (i.e. Single line text, Product, File, etc.).
- Select if you’ll be adding “One value” or a “List of values”
- Validations: Each data type includes varies values that you can add to limit the data (i.e. Min/max character count, etc.).
- To save, click on “Add”
- Repeat steps 5 and 6 to add more data fields into the Metaobject.
- Ensure that “Storefronts” is checked under the “Access options”
- Once you’re finished, save the Metaobject.
You will always be able to go back and edit these Metaobjects if you want to add, remove or change any values. You can see all of the Metaobjects defined if you navigate to “Settings” and then click on “Custom data”. At the bottom, you’ll see the list of Metaobjects.
Step 4: Adding data to your Metaobjects
- Navigate to "Content" and click on "Metaobjects". Here, you’ll see a list (or maybe it’s still empty) of metaobjects that have been created and that stored data.
- Click on “Add entry”. You’ll see a list of the defined Metaobjects in your store. Select the one that you want to add data to.
- Now you’ll see all of the data fields that you added to the Metafield. So go ahead and add all of the relevant data. Keep in mind that if you’re going to use this for each and every blog post (or product, page, etc.), you’ll have to create an entry for each, which will store different data.
- Once you added all of the data, ensure that “Status” is set to “Active”
- Click “Save”
Step 5: Associating Metaobjects with Entities
Once you have created Metaobjects, you need to associate them with the relevant entities in your store.
- Navigate to the respective entity in your Shopify Admin (e.g., "Blog Posts" for blog post-related Metaobjects).
- Scroll down to the "Metafields" section.
- You’ll see a table with the definition names on the left. If you don’t see it, click on “Show all”
- Find the row with the correct Definition name”, click on the grey box to the right and select the Metaobject that you created which stores the relevant data for that entity.
- Save the entity.
That’s it! You’ve successfully created a Metaobject and associated it to an entity.
Lastly, you’ll need to choose where to display this data on the website itself. To do this, you go to the Theme Editor to associate the Metafield with the specific content holder.
Step 6: Add the Metaobject to your Page Content
- Go to “Online Store” and then click on “Themes”
- Find the theme that you’re working on and click on “Customize”. The Theme Editor will now open.
- Navigate to the relevant page template (i.e. “Blog post”)
- On the left, you’ll see the list of sections that are part of this page template. Click the appropriate one, or the block that is part of this section.
- On the right, you’ll see the list of settings and content inputs. Next to most data fields, you’ll see an icon that you can click on. Click it and you’ll see the available Metaobjects for use.
- Click the Metaobjects that you created, which will then give you the list of data types stored in it. Select the one you want to use.
- Once you’re done, you can save your changes.
Now you're really done!
Watch the video below to see how we create these Metaobjects for our section “Shop the Look”:
Conclusion
Shopify Metaobjects provide a powerful way to extend the functionality of your online store and store custom data structures beyond the standard fields offered by Shopify. By following this step-by-step tutorial, you can effectively create Metaobjects, associate them with entities, and customize your data storage to meet your unique business requirements. Leverage the potential of Shopify Metaobjects to unlock new possibilities and enhance your store's functionality and customization options.